ZeroPassword™ MSP Program
SDO QuickStart Guide
The most common SDO deployment scenarios to get your MSP up and running quickly — Entra ID environments with Windows OS clients. Covers: Windows · O365 · Shared accounts · RADIUS proxy.
Prefer an offline version? Download the complete Quick Start Guide in PDF format.
Download Quick Start Guide (PDFBefore you begin
Please make sure you have access to the Octopus Support Center. Support Center links in this guide require authentication — if prompted to sign in, return to this guide and click the link again after logging in. If you did not receive an enrollment invitation, contact your Octopus SE or email support.doubleoctopus.com.
1. Purpose & Pre-Requisites
This guide covers the most common SDO deployment scenarios to get your MSP up and running quickly. It is not exhaustive — while it primarily focuses on Entra-only environments with Windows OS as clients, additional links are included throughout for deeper coverage of hybrid AD/Entra environments and other configurations.
Scope: Entra ID environment with the following use cases:
- Windows OS passwordless login
- O365 app login via federation
- Shared accounts for support auditability
- RADIUS proxy deployment
Start with a test tenant — ideally your own MSP’s internal environment — before onboarding customers. This gives you a safe place to break things.
Once your tenant is ready, connect an identity source. This guide uses Entra ID. If your environment is different, use the link for your scenario:
| Environment | Identity Source | Guide |
|---|---|---|
| Entra only | Entra ID | Entra |
| AD/Entra hybrid | Active Directory | Active Directory |
| AD only | Active Directory | Active Directory |
| Google Workspace | Google Workspace | Google Workspace |
| No directory | Sync local users to Entra (free), then use Entra | |
2. Integrate Entra as Identity Source
Follow this guide: Deploy Entra ID Directory on Octopus Server
At the end of this step, your identity source is connected to the SDO tenant and users are available to the platform.
Note: For AD-only or AD/Entra hybrid environments, follow this guide instead: Install Remote AD Agent
3. Desktop Passwordless Login
Install the SDO client on the end user’s Windows machine. Follow this guide: Windows: Install Octopus Desk Agent and Configure Service
Important — read before running the MSI: At Step 42 of that guide, check the “Entra ID Joined Machine” checkbox in the Settings tab before running the MSI Updater.
For macOS endpoints, additional documentation is available: SDO Client for Mac — Deploy and Configure
Enrolling a user
Once the MSI Updater completes and you have run the MSI, enroll a user to use SDO for Windows login.
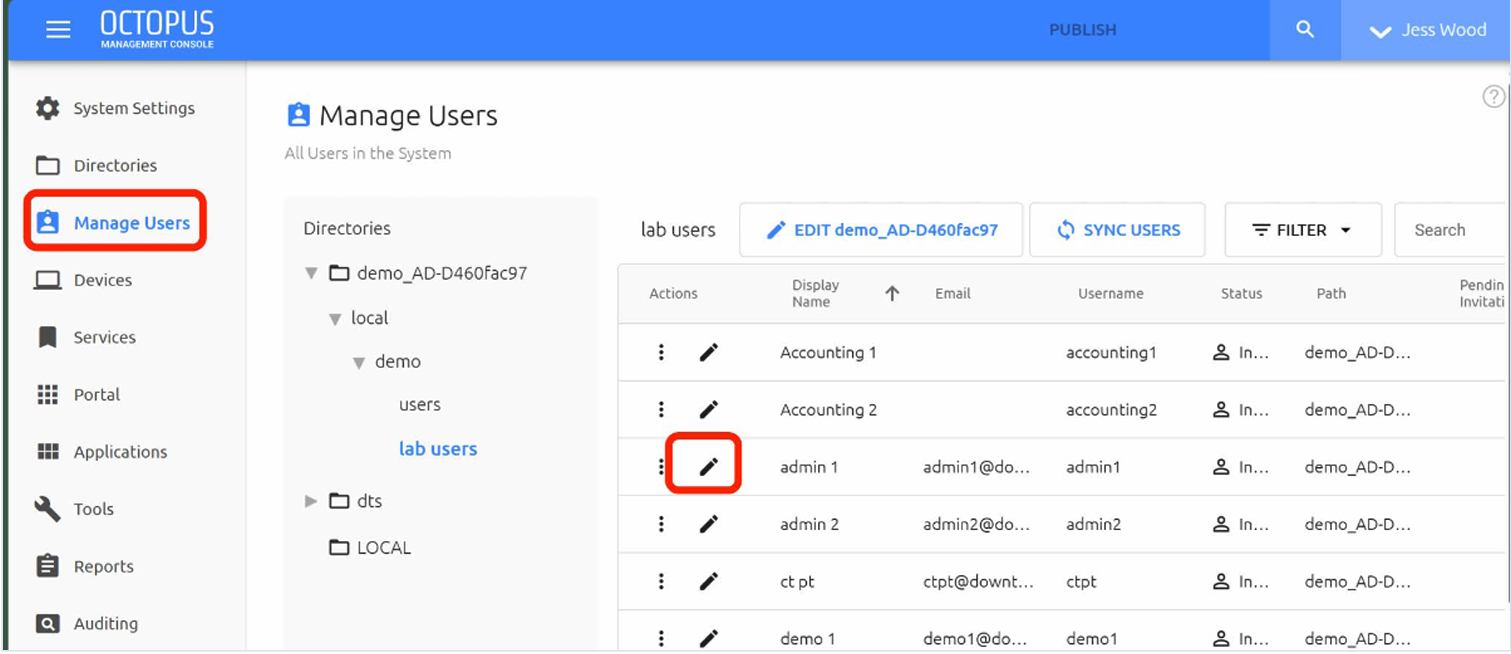
- From the SDO console, navigate to Manage Users and choose a user to edit.
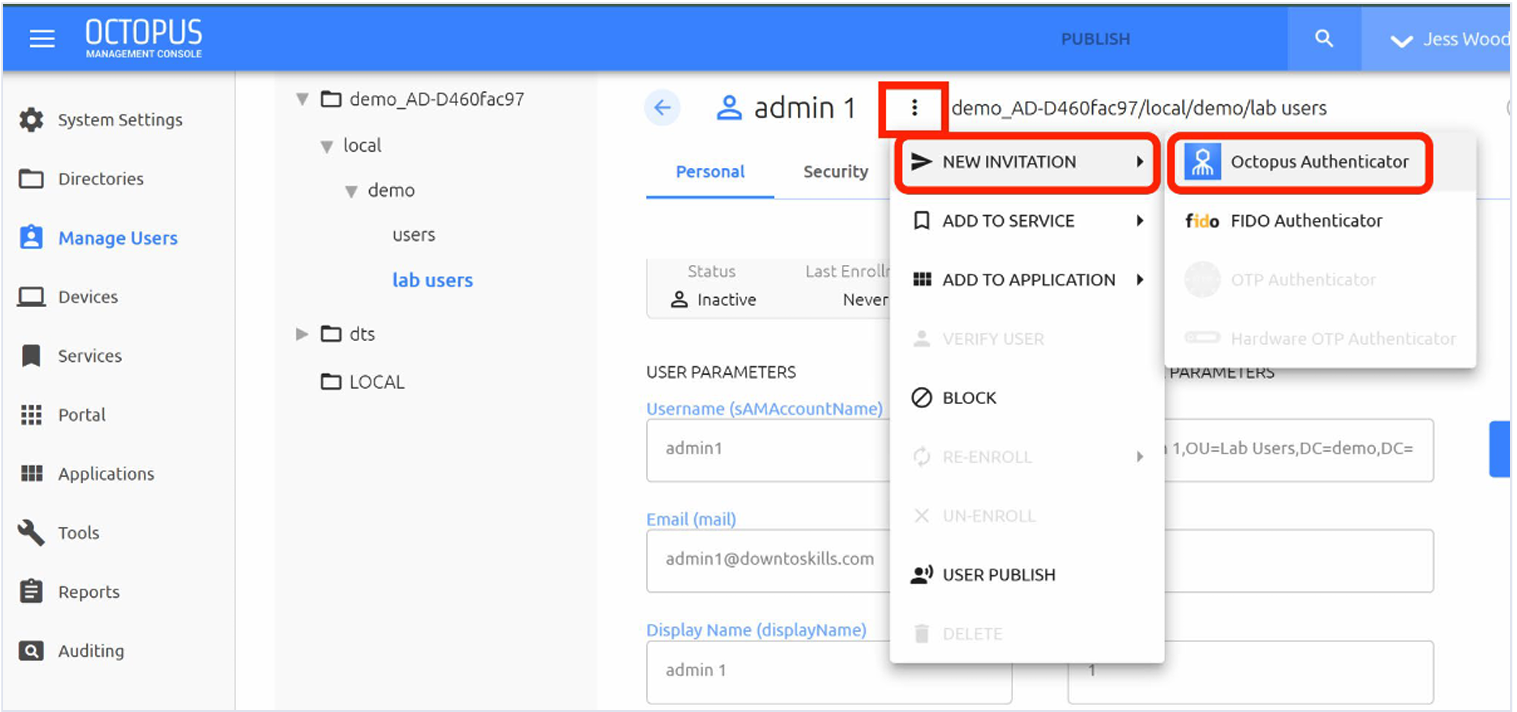
- Send a new invitation to the user to use the Octopus Authenticator.
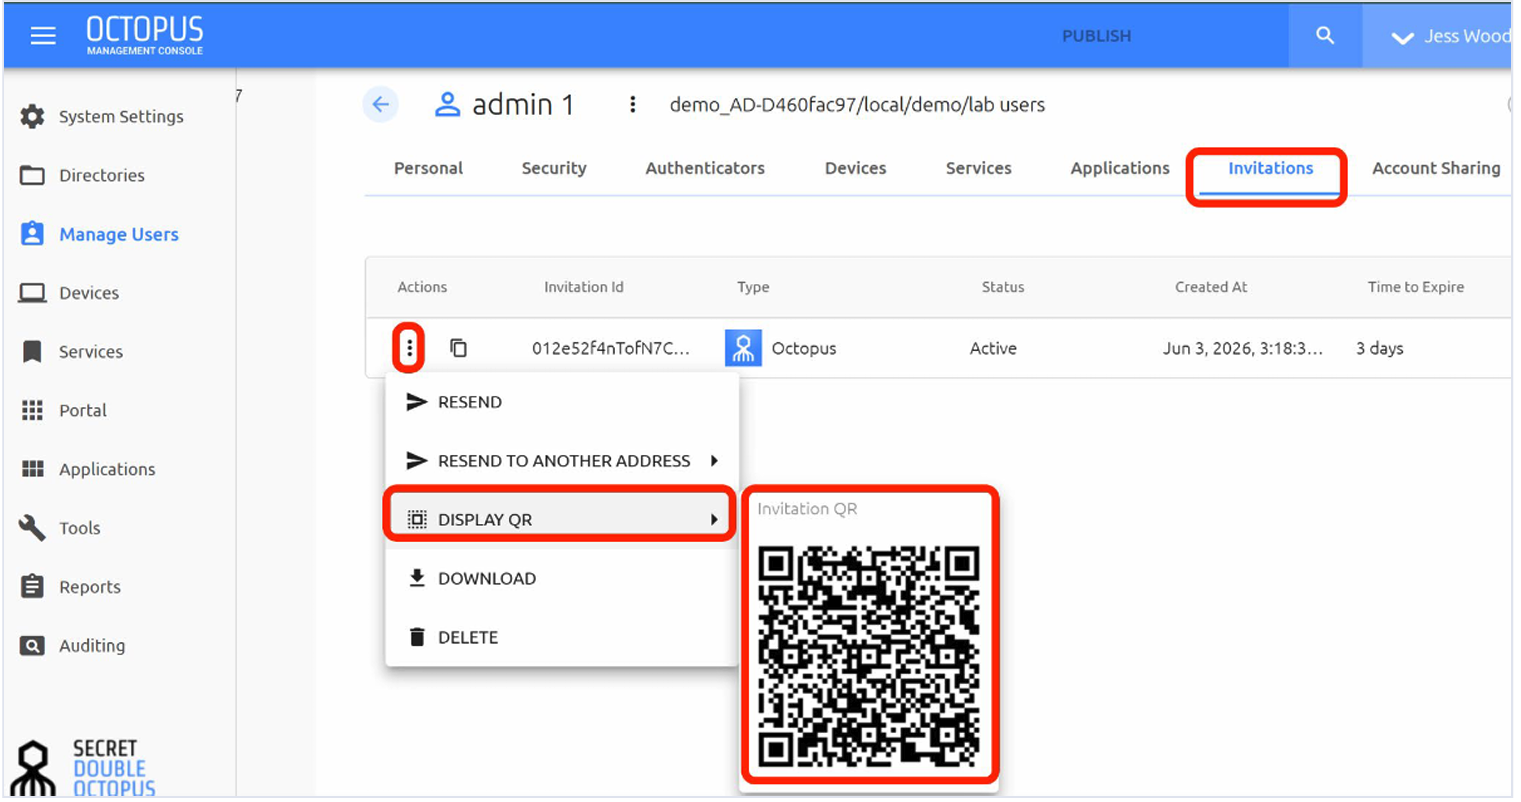
- From your phone’s SDO application, scan the QR code.
- Lock the client computer and enter your user’s name. Make sure Octopus App is selected and log in. You will receive a phone push notification you’ll need to accept for this user.
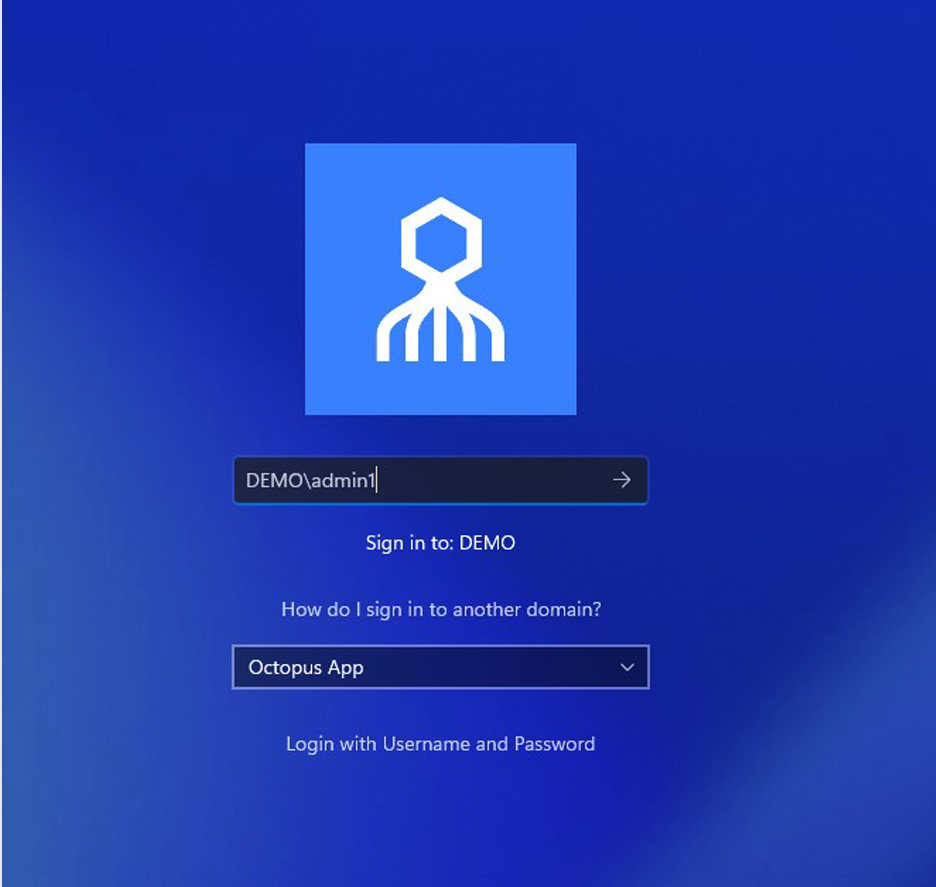
- Once you’ve approved the push notification, your phone app provides a code for initial use. Enter the code at the Windows login screen to complete your login.
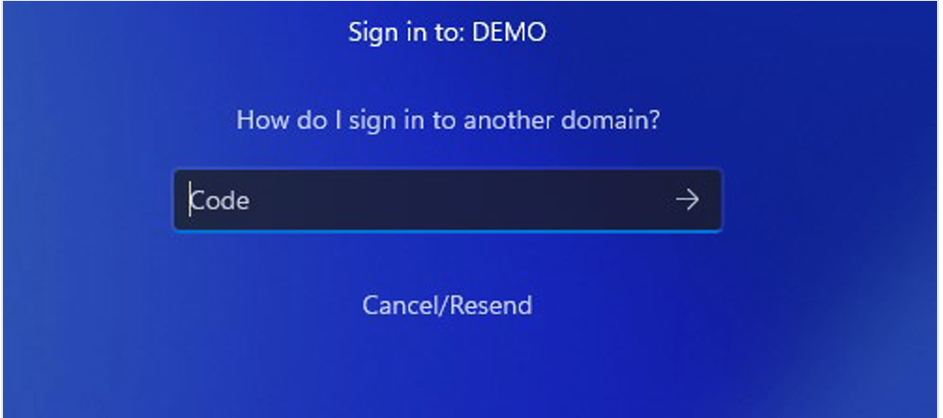
- On subsequent logins, the code entry step is skipped — the user simply accepts the push notification. Test this by locking the screen and logging back in.
4. Shared Accounts
Shared accounts let support staff log into a user’s profile without sharing that user’s password, creating an audit trail showing the real actor on the account.
Full instructions: Shared Accounts
5. Office 365 Federation
Follow this guide: Office 365 Federation with WS-Federation
Notes before you start:
- Step 23: Under Login Identifier, select both username and email.
- Steps 34–36: Re-authenticate only if prompted.
- Step 40: Disregard the instruction as written — the script output interface might have changed. Review first before selecting options. Select option 5 (view federation settings), not option 4 (unfederate).
- Federation may take up to 15 minutes to reflect in O365 apps even if the backend change appears instant.
Verify: Open a private/incognito browser and go to office.com. Log in with a federated user — you should be redirected to the SDO login flow and receive a phone push notification. Once you accept, you’ll be logged into office.com using the SDO process.
6. RADIUS Proxy
Follow this guide: Installing and Configuring the SDO RADIUS Proxy
Note: At Step 42, use the currently logged-in account as your test user.
Summary
You now have a working SDO foundation covering:
- ✓ Desktop login (Windows, passwordless)
- ✓ O365 app login (WS-Federation)
- ✓ RADIUS-protected app login
- ✓ Shared account access with auditability