Enrollment – Auto-Enroll Group
Preface
This guide explains how to configure an Auto-Enroll group so that users are automatically invited to enroll when they are added to the group, and automatically blocked when they are removed.
Auto-Enroll groups provide an additional layer of automation for both onboarding and offboarding. When combined with your existing directory integration, they help ensure that users have the right authenticators (Octopus Authenticator, FIDO, OTP) with minimal manual effort.
Note: Auto-Enroll behavior is available from Octopus Authentication Server v4.0 and was expanded in v4.6 and above to support FIDO and OTP enrollment invitations.
Enrollment – Auto-Enroll Group (PDF)
Download the full Auto-Enroll configuration guide as a PDF for offline use or sharing.
Download PDFPrerequisites
- Active Directory (AD) or directory service synced into the Octopus Authentication Server.
- SDO Admin Console access with permissions to manage Directories and Groups.
- Directory synchronization configured and working (users and groups imported into SDO).
- General settings for the authenticators you want to use (Octopus, FIDO, OTP) already configured.
- Server version 4.0+ (for Auto-Enroll) and 4.6+ (for FIDO/OTP invitations).
Introduction
The ability to designate a group in a service as an Auto-Enrolled group provides an additional level of automation for both onboarding and offboarding users.
- Users added to the Auto-Enroll group will automatically receive enrollment invite(s).
- Users removed from the group will be automatically blocked.
Auto-Enroll groups configuration was introduced in Octopus Authentication Server v4.0 and expanded in v4.6 and above to support FIDO and OTP enrollment invites as well. The configuration includes the Auto-Enroll invitation behavior and how users are handled when they leave the group.
Auto-Enroll Options
- Set users to Block when removed from auto-enroll group
- Send Octopus Authentication invitation
- Send FIDO Invitation
- Send OTP Invitation
Status Reference Table
| Type | General Setting State | Settings / Behavior |
|---|---|---|
| Octopus Authenticator | Enabled / Disabled (Authenticators) | When Enabled: Octopus Invitation is enabled and the admin can select On/Off. When Disabled: Octopus Invitation is disabled and the admin cannot select On/Off – last status is kept. |
| FIDO Authenticator | Enabled / Disabled (General Settings) | When Enabled: FIDO Invitation is enabled and the admin can select On/Off. When Disabled: FIDO Invitation is disabled and the admin cannot select On/Off – last status is kept. |
| Octopus OTP | Enabled / Disabled (Authenticators) | When Enabled: OTP Invitation is enabled and the admin can select On/Off. When Disabled: OTP Invitation is disabled and the admin cannot select On/Off – last status is kept. |
Enrollment – Auto-Enroll Group Flow
Follow these steps to configure an Auto-Enroll group and automatically invite users to enroll.
Create or Edit the Group in Active Directory
In your Active Directory, create a new group or edit an existing one that you want to use as the Auto-Enroll group.

Click on Members and Add Users
Open the group properties, go to the Members tab and add the users that should be auto-enrolled in SDO.


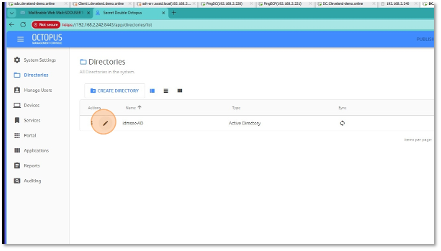
Open the SDO Admin Console and Select Directories
In the SDO Admin Console, navigate to Directories to configure your AD integration.

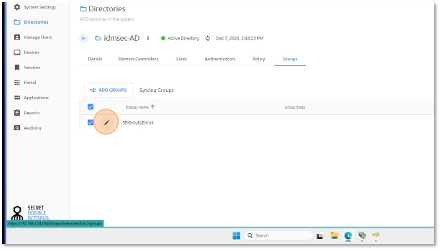
Edit Your AD Directory and Go to Groups
Edit your existing AD directory connection and select the Groups tab to import the Auto-Enroll group from AD.

Click Add Groups and Search for the Auto-Enroll Group
Click Add Groups and search for the group you created in AD. Select the group you want to configure as Auto-Enroll.


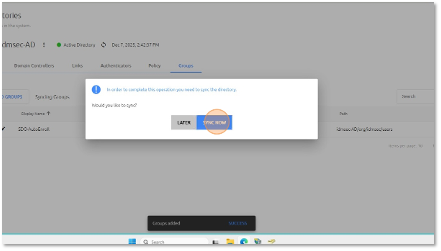
Save and Sync Now
After adding the group, click Save, and then click Sync Now to bring the group and its members into SDO.

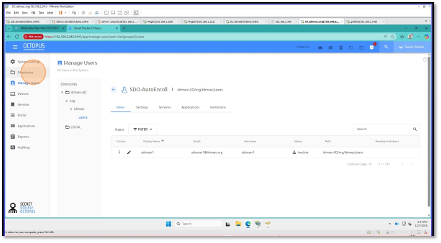
Edit the Imported Group and Verify Users (Optional)
Edit the imported group in SDO and verify that the correct users appear in the group before enabling Auto-Enroll. Optionally confirm that users do not already have invitations.


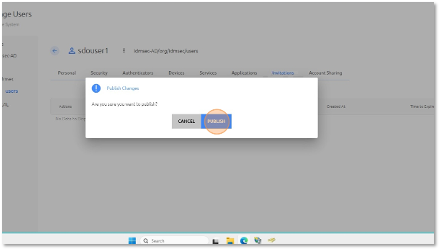
Click Publish
After verifying the group, click Publish to make the group configuration active.

Configure Policy – Send Invitation by Email
Go back to Directories, edit your directory again and select Policy. Enable Send invitation by email and choose which authenticators (Octopus, FIDO, OTP) you want to send invitations for.


Open the Group and Enable Auto-Enroll
Navigate to Groups, edit your Auto-Enroll group and click on the three dots (⋯) next to the group name. Select Enable AutoEnroll.


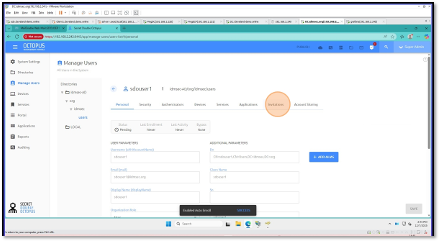
Invitations Displayed Next to Users
Once Auto-Enroll is enabled and the policy is configured, invitations will be automatically created and displayed next to each user in the group.

Open the User’s Invitations
Click on Invitations under the user to view the detailed invitations (Octopus, FIDO, OTP).
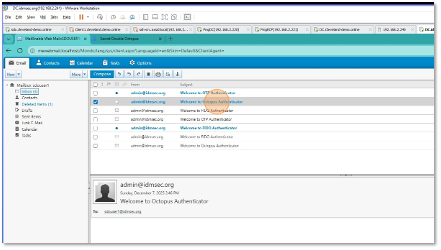
Display the QR Code and Start Enrollment
For Octopus Authenticator, click the three dots (⋯) next to the invitation and select Display QR Code. The user can scan the QR code with the Octopus Authenticator app to start the enrollment process.


✅ Auto-Enroll Setup Complete
Your Auto-Enroll group is now configured. Users added to the group will automatically receive enrollment invitations, and users removed from the group will be blocked according to your policy configuration.